Wednesday, November 1, 2023

Warmest Greetings 16 Card Workshop


Hello Crafters! Happy November 1st!
Hope you're enjoying this time of year! Today, I am celebrating my 29th Anniversary with CTMH! I can't believe how fast time flies! What an amazing journey this has been! I love this company so much!!πŸ’—

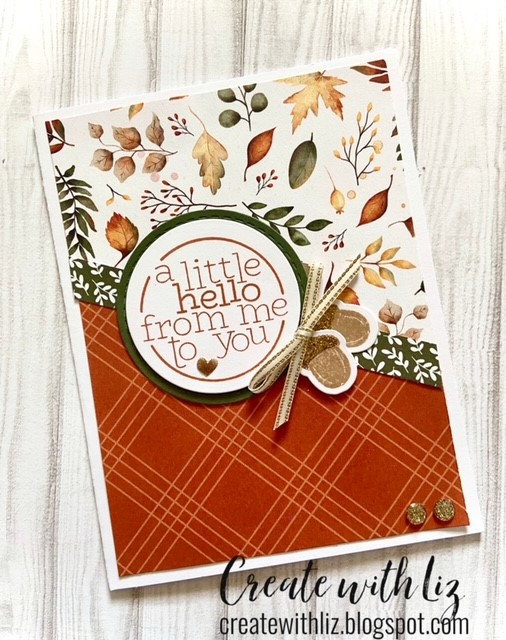
As we are getting closer to Thanksgiving and Christmas is right around the corner! Have you thought about Christmas cards yet? I am excited to share my brand-new Christmas Card Workshop called Warmest Greetings! It creates 16 cards two of 8 designs! There's 14 standard size cards and 2 slimline cards! 
I think you're going to really enjoy this one! I loved creating them! 

There are three options to receive my cutting files: 

Option 1 - Place a $25 min. order on my website here:
https://lizjohnson.closetomyheart.com                                                                                       Files will be emailed to you! Please let me know that you have placed an order to receive the files. Please allow up to 24 hours before receiving the files.

Option 2 - My Maker sisters may order my e-files for $12 USD. You're welcome to use this workshop to help your business grow! This would be a fun Christmas Card workshop for your customers! Please read the Maker agreement that's attached when receiving the files. Please allow up to 24 hours before receiving the files. 
**Files include paper, zip strips, and thin cuts cutting guides, assembly instructions, full color photo of each card, helpful tips, supply list, and Maker agreement. 
I prefer Venmo @ Liz-Johnson94, but I will accept PayPal (friends and family) @ lizann85@outlook.com

Option 3 -   Join my Crafty Happy Hearts Team today and receive access to all my files for FREE! This will help you build a thriving business! You can simply create the artwork for yourself if you're a hobbyist too!

Please email me if you have any questions!

Supplies needed:
  • X9054 November-December Mix-in paper packet 
  • Z7096 Warmest Greetings Stamp + Thin cuts 
  • D2204 Triangle Trees Stamp set
  • Z8064 Triangle Trees Thin cuts
  • Z6525 Desert Rose ink pad
  • X6055 Desert Rose CS (one sheet per person)
  • Z2831 Charcoal ink pad
  • X5953 Charcoal CS (one sheet per person)
  • Z6573 Acorn ink pad
  • Z6504 Sage ink pad
  • X6045 Sage CS (one sheet per person)
  • 1385 White Daisy CS (2 sheets per person) You will also need 8 additional sheets if you are cutting 16 card bases. You will need 14 standard size cards and 2 slimline cards. 
  • Z3224 Small Round Waterbrush 
  • Z4191 Silver Glitter Gems
  • Z1799 Silver Shimmer Trim
  • Z697 Round Sponge 
Optional items:
  • X254 White Card bases and envelopes
  • X257 Slimline Card bases and envelopes
Thank you for stopping by! I hope you will stop by again for more paper crafting fun! 

Happy Creating!
-Liz πŸ’—

Sunday, September 24, 2023

Plaid Pumpkin Card


Happy Fall! 

I can't believe summer has officially come to an end! But I love Fall and the cooler temperatures, leaves turning colors, and pumpkin everything! 

This card has all the Fall feels! These plaid front stencils from CTMH are AMAZING!! You're going to love creating beautiful artwork with these! 

To create the plaid technique, I first taped down the stencil with some washi tape or masking tape. I sponged the large stripe first with a blending brush and honey butter ink pad. You can create darker or softer shades by how hard you sponge and how much ink you pick up. I sponged the smaller stripes in between the bigger stripe with pumpkin ink. I turned the large stencil opposite directions and sponged with mist ink. In between the large mist stripes, I sponged the smaller stripes with toffee ink. The colors look so pretty together! You will have so much fun creating so many different color combinations! 


Here's the supply list:

CC9239 Plaid Card Front Stencils
Z4755 Cozy Up - Cardmaking stamp + thin cuts
X6076 Pumpkin cardstock
Z6576 Pumpkin ink pad 
Z6539 Mist ink pad
Z6536 Honey Butter ink pad 
Z2828 Toffee ink pad
Z7518 Intense Black ink pad
Z2060 3-D thin foam tape 
Z2525 Vintage Blue Tri- Blend marker
Z2486 Dull Green Tri-Blend marker
Z2517 Burnt Orange Tri-Blend marker
Z2519 Gold Yellow Tri-Blend marker
Z4572 Blending Brushes 
Z1263 Bitty Sparkles
Z3274 Clear Sparkles
1385 White Daisy cardstock

You can order these products here on my website:

Thanks for stopping by! 
Happy Creating!

LizπŸ’—


Wednesday, September 6, 2023

Thank You Pumpkin Card

Hello everyone!
I have been a little MIA this past year due to some health problems. I took a break from a few things so I could focus on my health. I am excited to be back and start sharing my love of paper crafting with all of you again! πŸ’—

Here's a fun card I created using the X7296B "It's the Good Life" paper and Gnomes for Autumn stamp + thin cuts. How many of you love to decorate using blue pumpkins? I do! I love that they are non-traditional! They are so fun, and they look so cute! This card is perfect for using leftover strips, scraps, and zip strips! I love to create cards that I can use up scraps! I hate wasting! Lol

First, before you begin gluing strips, I used the toffee shimmer brush to splatter the top half of card. You can also use a water brush and toffee ink pad to pick up ink in the lid and splatter your card. 

I cut different sizes in length and width of the paper. Widths are 1/4", 3/8", 3/4", and 1/2". I laid the strips across the card diagonally and glued each one right next to each other. 

I used toffee and mocha cardstock for my sentiment and stamped "Thank you" in Intense black ink. I used the CC72317 Gnomes for Autumn - Scrapbooking Stamp set for the pumpkin, leaf, and sunflower. The "Thank you" stamp is from the Z7071 Floral Notes stamp set. I stamped them all in intense black ink. I colored the pumpkin in the Tri-blend vintage blue blend. The leaf and sunflower were colored in the Tri-blend Muted Brown Blend marker. The stem on pumpkin and center of sunflower were colored with the tri-blend Earth Brown marker. 
I used thin 3-D foam tape to pop out the sentiment, pumpkin, and leaf.
 
Have fun creating with this cute paper collection and stamps! 
You can purchase these products here on my website:

Let me know if you have any questions! Thanks for popping in today! 

Happy Creating!
LizπŸ’—


Monday, November 28, 2022

Cherish 15 PML Card Workshop


Hello everyone!
I am excited to share this pretty workshop with you! This fun workshop creates 15 standard size cards! You're going to enjoy putting these together! They include the Cherish PML cards, paper, embellishments, mist ink pad, clear sparkles and mist shimmer trim! I created these with three pretty stamps sets! The font on these sets looks so much alike! I hope you enjoy these beautiful cards! 

**I am offering this as a local class to my customers on January 12th! Please contact me if you're interested and want to reserve a spot! Contact me for price of the class by emailing me @ lizann85@outlook.com 
To my Maker friends, here are the options to purchase my files and use them at your classes or crops. I think December or January would be great months to hold a Cherish Card Workshop! 

Option 1 - Place a $25 min. order on my website and receive the e-files for FREE! Please allow up to 24 hours before receiving your files. You can place your order here: http://lizjohnson.closetomyheart.com

Option 2 - My CTMH Maker Friends may order my e-files for $12.00 USD. You can use this workshop for your business, classes, and crops. Please review the Maker agreement that's attached when receiving the files. Please allow up to 24 hours before receiving the files. 

*Files includes paper and PML card cutting guides, assembly instructions, full colored photos of each card, supply list, and Maker agreement. I accept Venmo @ Liz-Johnson94 and PayPal (friends and family only) @ lizann85@outlook.com 

Option 3 - Join my Crafty Hapy Hearts Team today and receive access to all my files for FREE! This will help you build a thriving business! You can simply create the artwork for yourself if you're a hobbyist too!

Supply List:
X7287D Cherish PML cards
X7287B Cherish paper packet (1/2 paper packet per person)
X7287E Cherish Embellishments
D2121 Sending Smiles stamp set
A1286 Health, Love, and Happiness stamp set
A1284 Your Kindness stamp set
X6069 Mist cardstock (2 sheets)
Z6539 Mist stamp pad
8 sheets of white daisy cardstock (15 card bases and cut pieces) or use 15 cards and envelopes from the value pack
Z3274 Clear Sparkles
Z4661 Mist Shimmer trim
Z2060 Thin 3-D foam tape 

Let me know if you have any questions! You're welcome to email me @ lizann85@outlook.com 

You can order below by clicking the "Buy Now Button". Please use the friends and family option. PayPal fees have gone up to .91 cents! It really adds up! Thank you! You can avoid the fees and pay with Venmo if that works for you! 

Happy Creating! 

LizπŸ’—


Sunday, November 6, 2022

Tis the Season to be Jolly Card


Hello!

I was honored and excited that my card was chosen for the Creative Scrapbooker Magazine's November Card of the Month! I am hoping to make it to the second round of voting! We will have to wait and see!  This card was such a fun one to create! I used one of my favorite products in the October-December catalog! Love Z8053 Holly Embossing Folder + Stencil! This fun bundle is perfect for embossing and stenciling the embossed area! You will have hours of fun using this product! 
I colored the tree by creating a stencil. I cutout the tree using thin cuts. After you stamped it in intense black ink, take the stencil and place it over the tree. Take a sponge dauber and sponge ink all over tree with sage ink, then sponge and shade branches with pine ink. Add Carnation Red liquid pearls dots to each tree light. I glued a black star die to the top of tree, adding some black diamond stickles glitter glue to each black star. Love the extra sparkle it gives those stars! I did add a few more black stars and small stickle dots around the tree too!

Here's instructions to color your tree: 


I created my own stencil by cutting the tree out using the tree thin cuts and a die-cutting machine. Leave a space around the stencil for sponging. 


I took my stencil and placed it over the top of another tree that was cutout from the tree thin cut. 
First, sponge sage ink all over tree and darken the areas between the branches. Take the pine ink pad and sponge underneath the branches to give it a more shaded look. 


Here's what it should like. So cute, right?! ;)


Here's another angle of the scalloped circle and tree. The circle was lightly sponged with pine ink using a sponge dauber. 

Here's the shopping list:
Scalloped Circle thin cuts - retired
Z8053 Holly Embossing Folder + Stencil 
D2128 Let it Snow stamp set 
Z8047 Freshly Baked -Scrapbooking Stamp + Thin cuts
X7286B Christmas Story paper packet  
Z6504 Sage ink pad
X6045 Sage cardstock
Z6540 Pine ink pad
X6070 Pine cardstock
X6049 Scarlet cardstock
Z3561 Black Diamond Stickles Glitter Glue
Z3799 Carnation Red Liquid Pearls 
Z6046 Black Star Die-cut
Z4659 Pine Shimmer trim

You can purchase these products here on my website:

Please email me if you have any questions @ lizann85@outlook.com 

Happy Creating!

Liz πŸ’—


Sunday, October 16, 2022

Hello Maple Leaf Card


Hello Crafty Friends!

I am excited to share another fun autumn card with you! This one if a favorite! I love the open thin cut maple leaf and that gorgeous dark woodgrain paper! I cut my paprika cardstock @ 4" x 5 1/4" and Crisp Air paper @ 3 3/4" x 5". To create this card, I centered my maple leaf thin cut on the paper and used washi tape to hold it down and ran it through my die-cutting machine. I pulled the thin cut out and left the opening on my paper. I adhered 3-D foam tape to the B&T paper and attached it to the paprika cardstock. I glued this to my card base. I cut out a hello tag thin cut and stamped it in Toffee ink. I used a strip of the Mocha cardstock on the bottom and glued a strip of pine green zip strip to the Mocha. I glued this to the bottom, leaving a 1/2" from the bottom of card. I adhered two Crisp Air Dots to the bottom left of card and a small heart above the "Hello" sentiment. I glued a piece of ribbon to the tag. 

Shopping list: 
Crisp Air paper (this paper is retired) NOTE: You could easily change the paper and use the Four Seasons B&T paper instead!
X8036B Four Seasons B&T paper 
D2106 Crisp Air- Cardmaking 
Z8043 Maple Leaf thin cuts
X6033 Paprika cardstock
X6060 Mocha cardstock
X7284E Crisp Air Dots 
Z2828 Toffee ink pad
Standard card base

Happy Creating! 

Liz πŸ’—


Sunday, October 2, 2022

Crisp Air Hello Card


Happy Fall, Friends! 
I hope you're enjoying all the fall feels this time of year! This is my favorite season! Our beautiful mountains here in Utah are turning colors because of our cooler temperatures! Can't wait to take a drive up the canyon to see all these gorgeous colors! 
This card reminds me of all the fall feels! I loved the cute "Hello" sentiment stamp on this card! It totally works for this type of card! I did add a touch of gold stickles on the top of the acorns to give it a little autumn sparkle! This card is so much fun to make! I hope it inspires you! :)

 You can visit my website to purchase these products here:

Here's the shopping list:
M1318 A Little Hello stamp set 
Z3943 Circles Thin Cuts
X7284B Crisp Air paper packet 
X7284E Crisp Air Dots 
Z4670 Autumn Air stamp/thin cuts 
Z2212 Gold Glitter Gems
Z3560 Golden Rod Stickles
Z6515 Paprika ink pad
Z2828 Toffee ink pad
X6070 Pine cardstock 
Z2060 3-D thin foam tape
Gold ribbon

Happy Creating! 
Liz πŸ’—
 

Total Pageviews